|
|
||
|---|---|---|
| .github | ||
| docker | ||
| docs | ||
| public | ||
| scripts | ||
| src | ||
| tests | ||
| .browserslistrc | ||
| .dockerignore | ||
| .gitignore | ||
| CHANGELOG.md | ||
| eslint.config.js | ||
| index.html | ||
| jsconfig.json | ||
| LICENSE | ||
| package-lock.json | ||
| package.json | ||
| README.md | ||
| vite.config.js | ||
OwnTracks Frontend
Introduction
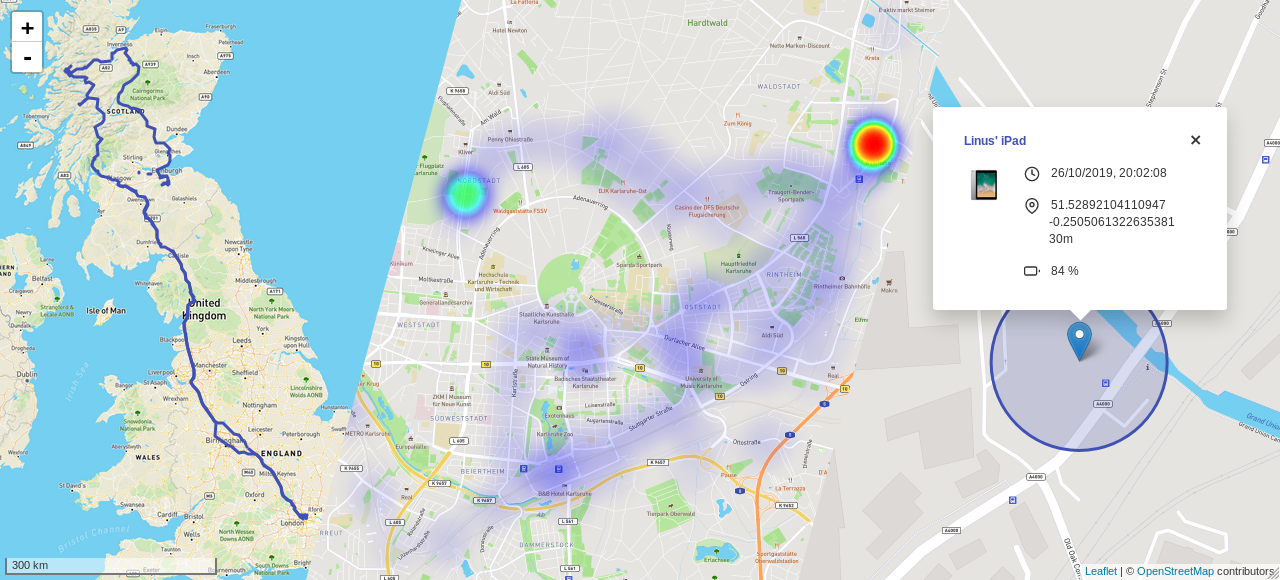
This is a web interface for OwnTracks built as a Vue.js single page application. The recorder itself already ships with some basic web pages, this is a more advanced interface with more functionality, all in one place.
Features
- Last known (i.e. live) locations:
- Accuracy visualization (circle)
- Device friendly name and icon
- Detailed information (if available): time, latitude, longitude, height, battery, speed and regions
- Location history (data points, line or both)
- Location heatmap
- Quickly fit all shown objects on the map into view
- Display data in a specific date and time range
- Filter by user or specific device
- Calculation of distance travelled
- Highly customisable
Installation
Docker
A pre-built Docker image is available on Docker Hub as owntracks/frontend.
You can start a container directly via docker run:
$ docker run -d -p 80:80 -e SERVER_HOST=otrecorder-host -e SERVER_PORT=8083 owntracks/frontend
Or you can use docker-compose (if you also run the OwnTracks Recorder with the default
compose config, and the service is named otrecorder):
version: "3"

services:
  owntracks-frontend:
    image: owntracks/frontend
    ports:
      - 80:80
    volumes:
      - ./path/to/custom/config.js:/usr/share/nginx/html/config/config.js
    environment:
      - SERVER_HOST=otrecorder
      - SERVER_PORT=8083
    restart: unless-stopped
To change the port on which the nginx server will listen on, set the
LISTEN_PORT enviroment variable - default is 80.
To build the image from source replace image: with:
build:
  context: ./owntracks-frontend
  dockerfile: docker/Dockerfile
(assuming you have this repository cloned to owntracks-frontend in the same
directory as docker-compose.yml)
Manually
- Run
npm installto install dependencies - Run
npm run buildto compile and minify for production - Copy the content of the
dist/directory to your webroot
Configuration
It's possible to get started without any configuration change whatsoever, assuming your OwnTracks API is reachable at the root of the same host as the frontend.
Copy public/config/config.example.js to
public/config/config.js and make changes as you wish.
See docs/config.md for all available options.
Development
- Run
npm installto install dependencies - Run
npm run devto compile for development and start the hot-reload server - Run
npm run lint:jsto lint JavaScript/Vue files - Run
npm run lint:mdto lint Markdown files - Run
npm run lint:scssto lint SCSS files - Run
npm run format:jsto format JavaScript/Vue files - Run
npm run format:mdto format Markdown files - Run
npm run format:scssto format SCSS files - Run
npm testto run unit tests
CORS-Proxy
You can use the corsProxy.js script to use your production
instance of OwnTracks for development without making changes to its CORS-Headers:
$ npm run cors-proxy
If you have basic authentication
enabled, create a .env file with your credentials:
OT_BASIC_AUTH_USERNAME=user
OT_BASIC_AUTH_PASSWORD='P@$$w0rd'
Then run:
$ env $(cat .env | xargs) npm run cors-proxy
The default host and port it binds to is 0.0.0.0:8888. Change using the OT_PROXY_HOST
and OT_PROXY_PORT environment variables.
Finally update api.baseUrl in your config to "http://0.0.0.0:8888/https://owntracks.example.com".
I18n
This project uses Vue I18n. To see missing and unused i18n entries, run:
$ npm run i18n:report
To add a new locale, copy en-US.json to <locale>.json in src/locales
and start translating the individual strings. Make sure to mention the new locale to the docs!
For a specific example see commit b2edda4
where German translations were added.
Contributing
Please feel free to open an issue and discuss your ideas and report bugs. If you think you can help out with something, open a PR!


